
01 / 03
Level Gauge Glass
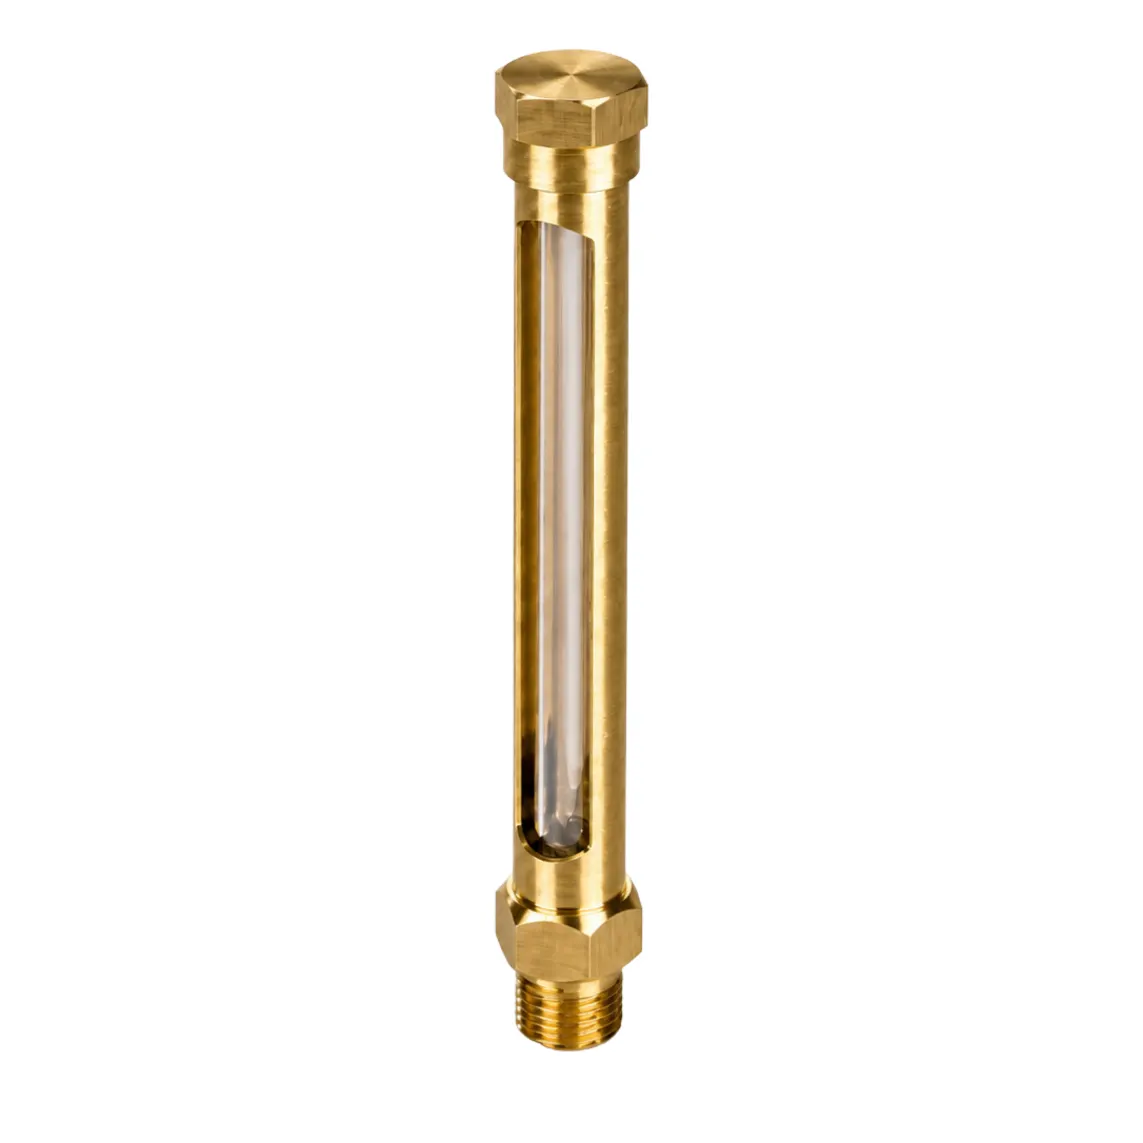
Oil level indicators are used in tanks or containers where it is necessary to maintain a minimum level of oil for the proper functioning of the system. Thanks to the easy vertical inspection of the same level, prompt attention to the system’s needs is allowed and failures for engines and gear systems are prevented.
Gulf Coast Glass's Straight Type Level Indicator is ingeniously designed for broad applicability across industries requiring precise oil level monitoring. This straightforward yet highly effective tool is pivotal for ensuring the accurate maintenance of oil levels, which is critical for the smooth operation of machinery and systems. Its design allows for easy vertical inspection, enabling prompt responses to fluid level changes and safeguarding against the risks of system failures. The Straight Type Level Indicator features a threaded connection for straightforward installation onto the surface of oil-containing tanks. Its direct contact with the fluid ensures rapid and accurate level detection, making it an indispensable asset where visibility from the standard operator's perspective is crucial. Reflecting Gulf Coast Glass's hallmark of quality, this indicator merges functionality with reliability, providing a clear and durable solution for monitoring oil levels in various operational environments.
Using a straight Gulf Coast Glass oil level indicator instead of a type L can be advantageous due to its simplicity and cost-effectiveness. It offers a direct line of sight for easy reading, is easier to install and maintain, and fits well in applications with ample space around the mounting area. Additionally, straight indicators are often more compatible with existing equipment and reduce overall system complexity, making them a practical choice for various industrial applications.
Gulf Coast Glass products are built-to-last. We do not try to save money in the components used, the quality of the products used, and the robustness of the parts. However, we understand that competition worldwide is fierce and price is a key factor for decision-makers, therefore we save money in bulk purchase, optimized logistics, optimized manufacturing processes, and high-level machinery. This helps Gulf Coast Glass deliver high-quality products at a very competitive price.
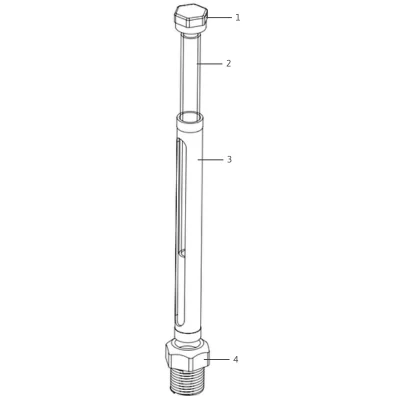
| Item | Part name | Material options |
|---|---|---|
| 1 | Stopper |
|
| 2 | Glass Tube |
|
| 3 | Body |
|
| 4 | Connection |
|
| Connection type | NPT threaded |
|---|---|
| Level indication type | Optical in internal tubular sight glass |
| Working pressure | From 0 to 150 PSI |
| Working temperature | -30°C up to 150°C |
| Connection sizes | 1/4" NPT, 3/8" NPT, 1/2" NPT |
| Minimum length | 2" Overall Length |
| Maximum possible length | 60" Overall Length |
| Standard length | 6" Overall Length |
Preparation:
Ensure the machine or tank is turned off and depressurized • Clean the mounting area on the tank or reservoir to remove any dirt, oil, or debris using a cleaning cloth.
Inspect the Indicator:
• Check the Gulf Coast Glass type L oil level indicator for any visible damage. • Verify that the threads and sealing surfaces are clean and intact.
Apply Sealant:
• Apply pipe sealant or wrap Teflon tape around the threaded connections on the oil level indicator. This ensures a tight seal and prevents leaks.
Align the Indicator:
• Position the indicator at the designated mounting point on the tank or reservoir. Ensure the sight glass or tube is oriented for optimal visibility.
Thread the Indicator:
• Carefully thread the indicator into the mounting port. Hand-tighten initially to ensure the threads are correctly aligned and not cross-threaded.
Tighten the Connections:
• Use a wrench or spanner to tighten the connections securely. Be cautious not to overtighten, as this can damage the threads or the indicator.
Check Alignment:
• Ensure the straight sight glass or tube is properly aligned and visible. Adjust if necessary before final tightening.
Inspect Seals:
• Check all seals and connections to ensure there are no gaps or potential leak points.
Test the Installation:
• Slowly fill the tank or reservoir with oil while observing the indicator for any signs of leaks. • Check the oil level to ensure the indicator accurately reflects the fluid level.
Final Check:
• Once the tank is filled, recheck all connections and the sight glass for proper installation and operation.
Documentation:
• Record the installation date and any observations in the maintenance log for future reference.
Talk to our team
Contact us with your application details — pressure, media, and connections — and we will help you specify the right sight glass.